Attribution
This tutorial is a derivative of the Angular Tour Of Heroes App and Tutorial under CC BY 4.0..
The application now has a basic title. You will shortly create a new component to display hero information, but before you do, you need to define a "Hero". You do that by creating a class.
Add a new folder to the root of the project named Models.
Select the Models folder, press Ctrl+Shift+A and then select Class from the New Items dialogue. Name the file Hero.cs.
Replace the existing content in Hero.cs with the following:
namespace TourOfHeroes.Models
{
    public class Hero
    {
        public int Id { get; set; }
        public string Name { get; set; }
    }
}
Open _Imports.razor (in the root of the project) and add the following line to the existing content:
@using TourOfHeroes.ModelsThis makes the contents of the
TourOfHeroes.Modelsnamespace available to all component files in the project without having to use fully qualified names, or having to explicitly import the namespace into each component file.Add a new Razor component to the Pages folder named Heroes.razor.
Replace the existing code with the following:
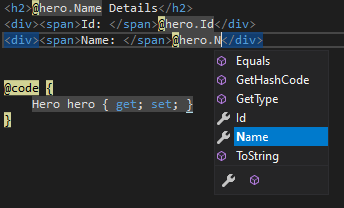
@page "/heroes"

<h2>@hero.Name Details</h2>
<div><span>Id: </span>@hero.Id</div>
<div><span>Name: </span>@hero.Name</div>


@code {
    Hero hero { get; set; } = new Hero { Id = 1, Name = "Windstorm" };
}
This is a routeable component, indicated by the
@pagedirective at the top, and the relative URL provided in the route template that follows the directive. The HTML is interspersed with Razor syntax, displaying the details of theHeroinstance that is declared with a default value in the@codeblock. The @code block is where application processing code is placed.As you type this code, you should notice that Intellisense provides code completion automatically:
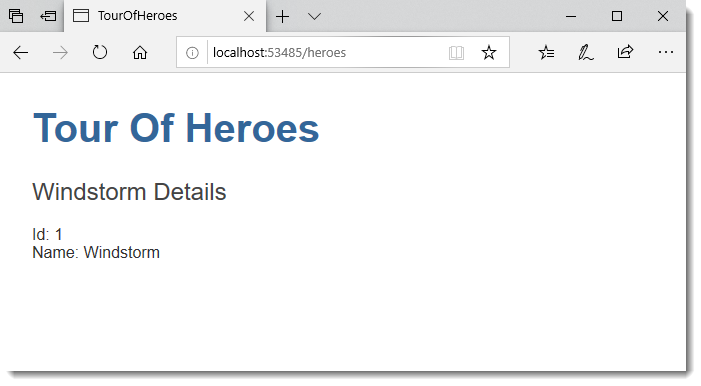
Press Ctrl+F5 to launch the application in the browser, and navigate to
/heroes. You should see the details of your hero displayed:
Edit the hero
Users should be able to edit the hero name in an <input> textbox.
The textbox should both display the hero's Name property and update that property once the user has changed the value. That means data flows from the component class out to the screen and from the screen back to the class.
To automate that data flow, setup a two-way data binding between the <input> form element and the hero.Name `property.
Two-way binding
Leaving the @page directive and the @code block alone, refactor the HTML code in the Heroes component so it looks like this:
<h2>@hero.Name Details</h2>
<div><span>Id: </span>@hero.Id</div>
<div><span>Name: </span>@hero.Name</div>
<div>
    <label>
        Name:
        <input @bind=hero.Name  />
    </label>
</div>
The @bind attribute is Blazor's data binding syntax. Here it binds the hero.Name property to the HTML textbox so that data can flow in both directions: from the hero.Name property to the textbox, and from the textbox back to the hero.Name.
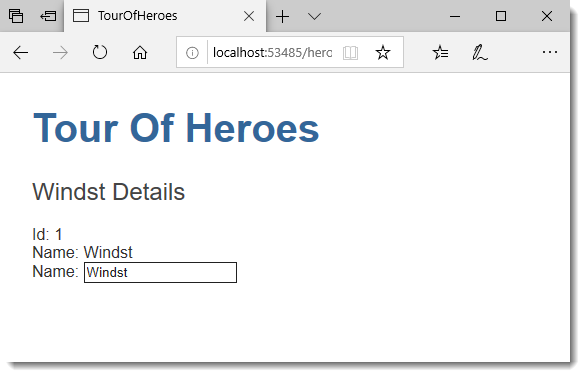
Run the application in the browser and amend the name of the hero in the textbox. When the textbox loses focus, the heading and details are automatically updated to reflect the amended name.
By default the bind attribute sets the value of the <input> element's value attribute initially, and hooks into the change event of the <input> element, updating the value attribute when the event fires.
You can also hook data binding into other events. Alter the input element so that the code looks like this:
<input @bind=hero.Name @bind:event=oninput />
Now when you re-run the application, the values in the heading and details are updated as the you type.
Summary
- You created a Heroes component.
- You displayed the Heroes component by adding an
@pagedirective with a route template, and then navigating to it. - You used two-way data binding with the
@bindattribute. - You used data binding to target a specific event
Previous: The Application Shell
Next: Displaying a List
