Attribution
This tutorial is a derivative of the Angular Tour Of Heroes App and Tutorial under CC BY 4.0..
You begin by creating an initial application using Visual Studio. Throughout this tutorial, you'll modify and extend that starter application to create the Tour of Heroes app.
In this part of the tutorial, you'll do the following:
- Set up your environment.
- Create a new app project.
- Serve the application.
- Make changes to the application.
Set up your environment
To set up your development environment, download and install the latest version of Visual Studio 2019 if you haven't already installed it. At the time of writing, the Community Edition is free for individuals. The Developer and Enterprise editions offer time-limited free trials. You should check the relevant licence conditions for further details.
You should also ensure that you have installed the latest version of the .NET Core 3.0 SDK.
Create the initial application
You develop apps in the context of a solution. A solution contains the files for one or more projects. A project is the set of files that comprise an app, a library, or unit tests. For this tutorial, you will eventually create two apps and a library.
To create the initial app project:
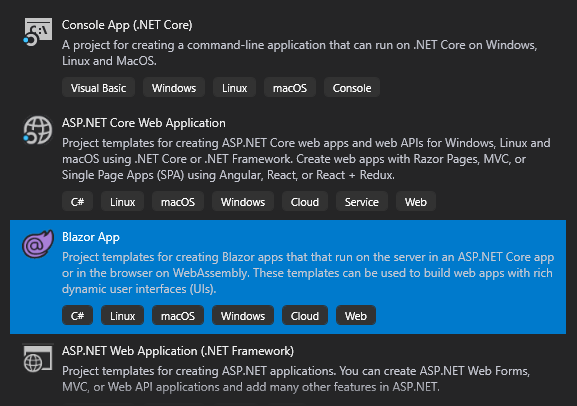
Open Visual Studio and select the Create a new project option:

Choose Blazor App from the available options
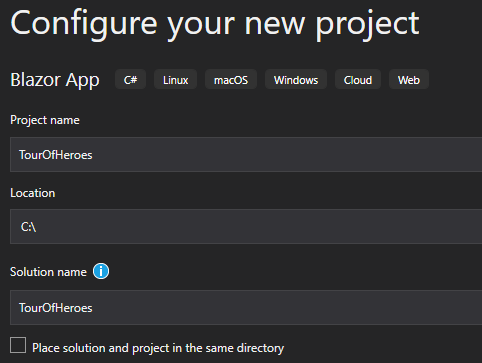
Name the application TourOfHeroes and select a suitable location for the application files and click Create:
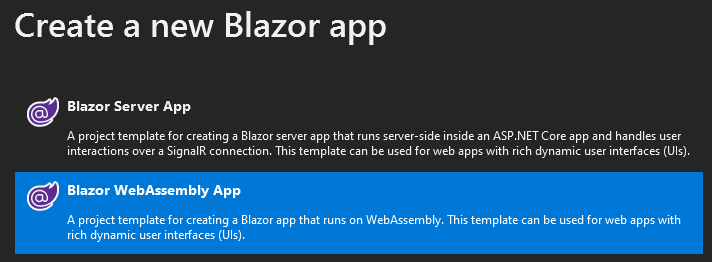
Choose Blazor Web Assembly app in the next step:
Visual Studio creates the following solution and starter project files:
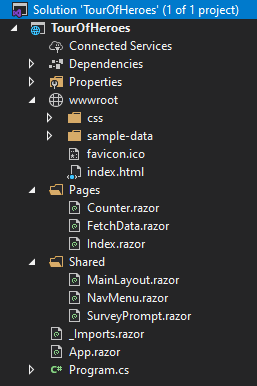
- A new solution, with a root folder named TourOfHeroes and a .sln file.
- An initial skeleton app project, also called TourOfHeroes (in the TourOfHeroes subfolder).
- Related configuration files.
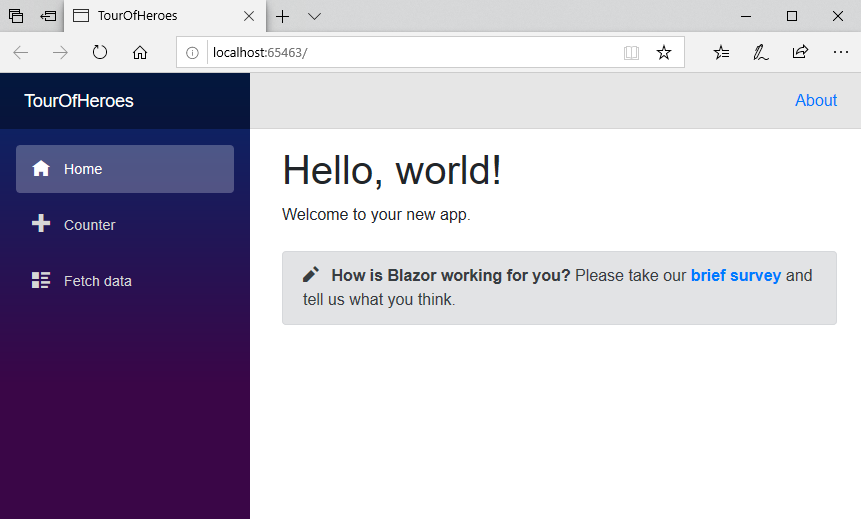
The initial app project contains a simple app that demonstrates a couple of Blazor features, ready to run.
Serve the application
You can run the application is a number of ways:
- Press F5 to start the application in debug mode
- Press Ctrl+F5 to start without debugging (you will use this option mostly)
- Click the green arrow
 in the main menu
 - Open a command prompt and navigate to the project directory (the one that includes the TourOfHeroes.csproj file) and execute the following command:
dotnet run
The first three options will all result in the application launching in a browser:
The dotnet run option starts the application, and tells you the URL that the application is running under:
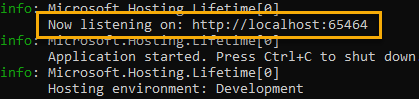
Note: the port number is generated randomly when the application is scaffolded. If you selected this option, you should copy and paste the URL into your browser.
Razor Components
The application is hosted in a single HTML file called index.html, located in the wwwroot folder. The file references a JavaScript file named blazor.webassembly.js, which is responsible for downloading the .NET runtime, the application and its dependencies and then for initialising the runtime to run the application.
Components are the fundamental building blocks of Blazor applications. They display data on the screen, listen for user input, and take action based on that input. Razor components can act as containers for child components. The App component is the entry point into the application and contains a Router component, which is built in to Blazor. The Router component's primary role is to locate and render content based on the current URL.
Within the Pages folder, there are three further components: Index, Counter and FetchData. Each of these have an @page directive at the top of the file. This directive makes them routable components, i.e. they can be found at the relative URL specified in the route template that follows the @page directive.
Further components can be found in the Shared folder. The most interesting one at the moment is the MainLayout component. This component has an @inherits directive at the top, referencing the LayoutComponentBase type. This makes the component a layout component. Razor layout files provide a means to apply a consistent style to multiple pages. Layouts are typically where you place common elements, such as headers, footers, site navigation etc.
Make changes to the application
You are going to replace the existing layout with one that applies the minimal styles and structure of the original Angular Tour Of Heroes.
- Right click on the Shared folder and choose Add -> New Item from the context menu that appears. Alternatively, press Ctrl+Shift+A having selected the Shared folder.
- Choose Razor Component from the available templates
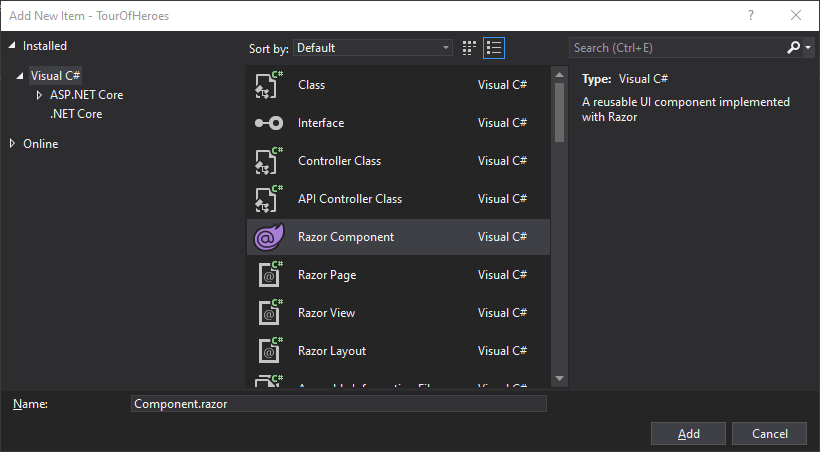
- Name the new file TourOfHeroesLayout.razor.
- Replace the existing content with the following code:
This creates an empty layout file. It inherits from@inherits LayoutComponentBase <h1>Tour Of Heroes</h1> @BodyLayoutComponentBaseand includes@Body, which is Razor syntax for rendering theBodyproperty of theLayoutComponentBaseclass. It defines where within the layout, the content should be displayed. - Open the App.razor file in the root of the project, and replace the values of the
DefaultLayoutandLayoutparameters to refer to the layout that you just created:<Router AppAssembly="@typeof(Program).Assembly"> <Found Context="routeData"> <RouteView RouteData="@routeData" DefaultLayout="@typeof(TourOfHeroesLayout)" /> </Found> <NotFound> <LayoutView Layout="@typeof(TourOfHeroesLayout)"> <p>Sorry, there's nothing at this address.</p> </LayoutView> </NotFound> </Router>
Add application styles
Most apps strive for a consistent look across the application. The Blazor template includes Bootstrap for this purpose. It also includes a CSS file, app.css for you to put your own style customisations in. This tutorial will not use Bootstrap.
Open wwwroot/css/app.css and remove everything except the two style declarations related to the
blazor-error-uiselector:#blazor-error-ui { background: lightyellow; bottom: 0; box-shadow: 0 -1px 2px rgba(0, 0, 0, 0.2); display: none; left: 0; padding: 0.6rem 1.25rem 0.7rem 1.25rem; position: fixed; width: 100%; z-index: 1000; } #blazor-error-ui .dismiss { cursor: pointer; position: absolute; right: 0.75rem; top: 0.5rem; }Then add the following code:
/* Application-wide Styles */
h1 {
  color: #369;
  font-family: Arial, Helvetica, sans-serif;
  font-size: 250%;
}
h2, h3 {
  color: #444;
  font-family: Arial, Helvetica, sans-serif;
  font-weight: lighter;
}
body {
  margin: 2em;
}
body, input[type="text"], button {
  color: #333;
  font-family: Cambria, Georgia;
}
/* everywhere else */
* {
  font-family: Arial, Helvetica, sans-serif;
}
Open Index.html in wwwroot and comment out or remove the reference to Bootstrap in the
headelement:<head> <meta charset="utf-8" /> <meta name="viewport" content="width=device-width" /> <title>TourOfHeroes</title> <base href="/" /> <!--<link href="css/bootstrap/bootstrap.min.css" rel="stylesheet" />--> <link href="css/site.css" rel="stylesheet" /> </head>Open Index.razor in the Pages folder and remove all but the first line of code:
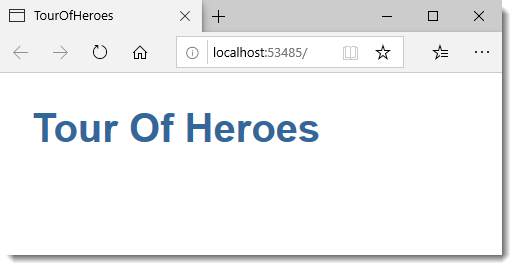
@page "/"Run the application by pressing Ctrl+F5. The application should only show the h1 heading from the layout that you created:
Summary
- You created the initial application from a template.
- You learned that Razor components form the building blocks of Blazor applications.
- You created your own layout component to replace the default one
Next: The Hero Editor
Previous: Introduction
