Attribution
This tutorial is a derivative of the Angular Tour Of Heroes App and Tutorial under CC BY 4.0..
The Tour of Heroes Heroes component is currently getting and displaying fake data.
After the refactoring in this tutorial, the Heroes component will be lean and focused on supporting the view. It will also be easier to unit-test with a mock service.
Why services?
UI components shouldn't fetch or save data directly and they certainly shouldn't knowingly generate fake data. They should focus on presenting data and delegate data access to a service. Classes that provide services to components are also known as dependencies, in that the component depends on the service for data that the component is designed to display.
In this tutorial, you'll create a HeroService that all application classes can use to get heroes. Instead of creating that service with new, you'll rely on Blazor's dependency injection system to inject it into the Heroes component.
Services are a great way to share information among classes that don't know each other. You'll also create a MessageService and inject it in two places:
- in
HeroServicewhich uses the service to send a message - in a Messages component which displays that message
Create the HeroService
Add a new folder to the root of the project and name it Services.
Select the folder and press Ctrl+Shift+A. From the Add New Item dialog, choose Interface and name it IHeroService.cs.
Replace the existing code with the following:
using System.Collections.Generic;
using System.Threading.Tasks;
using TourOfHeroes.Models;

namespace TourOfHeroes.Services
{
    public interface IHeroService
    {
        Task<List<Hero>> GetHeroes();
    }
}
An interface is an abstraction. It specifies the signatures of methods without providing an implementation. Any class that implements the interface is responsible for proving an implementation of the specified methods.
You can program to an interface. What this means in practice is that the consumer of the service (e.g. the Heroes component) will support code that calls methods on an interface without having to know anything about the actual implementation of the interface. This is also known as decoupling the component from the implementation of the dependency.
Add another new file, this time a Class file and name it HeroService.cs.
Replace the existing code with the following:
using System.Collections.Generic;
using System.Threading.Tasks;
using TourOfHeroes.Models;

namespace TourOfHeroes.Services
{
    public class HeroService : IHeroService
    {
        List<Hero> heroes = new List<Hero>{
            new Hero { Id = 11, Name = "Dr Nice" },
            new Hero { Id = 12, Name = "Narco" },
            new Hero { Id = 13, Name = "Bombasto" },
            new Hero { Id = 14, Name = "Celeritas" },
            new Hero { Id = 15, Name = "Magneta" },
            new Hero { Id = 16, Name = "RubberMan" },
            new Hero { Id = 17, Name = "Dynama" },
            new Hero { Id = 18, Name = "Dr IQ" },
            new Hero { Id = 19, Name = "Magma" },
            new Hero { Id = 20, Name = "Tornado" }
        };

        public async Task<List<Hero>> GetHeroes()
        {
            return await Task.Run(() => { return heroes;});
        }
    }
}
The
HeroServiceimplements the interface that you created earlier, and therefore provides a valid implementation of theGetHeroesmethod, returning aList<Hero>. The service could get hero data from anywhere — a web service, local storage, or a mock data source (as in this example).Removing data access from UI components into separate classes means you can change your mind about the implementation anytime, without touching any components. They don't know how the service works. The implementation in this tutorial continues to deliver mock heroes, but later, the data will come from a web API. The
GetHeroesmethod is asynchronous. In this particular case, it doesn't need to be. The asynchronicity is contrived. You will use asynchronous code to call into the web service later. In the meantime, the asynchronous methods are placeholders for that eventuality.Open Program.cs in the root of the project and add the highlighted lines of code:
using Microsoft.AspNetCore.Blazor.Hosting;
using Microsoft.Extensions.DependencyInjection;
using System.Threading.Tasks;
using TourOfHeroes.Lib.Services;

namespace TourOfHeroes
{
    public class Program
    {
        public static async Task Main(string[] args)
        {
            var builder = WebAssemblyHostBuilder.CreateDefault(args);
            builder.RootComponents.Add<App>("app");

            builder.Services.AddTransient(sp => new HttpClient { BaseAddress = new Uri(builder.HostEnvironment.BaseAddress) });
            builder.Services.AddSingleton<IHeroService, HeroService>();
            await builder.Build().RunAsync();
        }
    }
}
The
HeroServiceis registered with the dependency injection system as a singleton. An instance of theHeroServiceclass will be created when first requested and then the same instance will be provided to code that calls methods onIHeroServiceas needed.Add the following line to the _Imports.razor file in the project root:
@using TourOfHeroes.ServicesThe
HeroServiceis now ready to plug into the Heroes component.Alter the Heroes component, making the changes highlighted below:
@page "/heroes"
@inject IHeroService  heroService

<h2>My Heroes</h2>
<ul class="heroes">
    @foreach (var hero in heroes)
    {
        <li @onclick="@(e => onSelect(hero))" class="@(hero == selectedHero ? "selected" : "")">
            <span class="badge">@hero.Id</span> @hero.Name
        </li>
    }
</ul>

<HeroDetail hero="@selectedHero"></HeroDetail>

@code {
    List<Hero> heroes { get; set; } = new List<Hero>();

    Hero selectedHero { get; set; }

    void onSelect(Hero hero)
    {
        selectedHero = hero;
    }

    protected override async Task OnInitializedAsync()
    {
        heroes = await heroService.GetHeroes();
    }
}
The first change illustrates the use of the
@injectdirective to inject theHeroServiceinto the component. Note that it references the interface. the DI system will resolve the implementation at runtime, based on the registration you set up earlier in theMainmethod of theProgramclass.The second change see the data removed from the component and the
List<Hero>initialised to an empty list instead.The final change sees a method being added to the component -
OnInitializedAsync, which is executed when the component has been initialised. This is the place to obtain data from the service.
Now if you run the application and navigate to /heroes, it should continue to work as before.
Show messages
This section guides you through the following:
- adding a Messages component that displays app messages at the bottom of the screen
- creating an injectable, app-wide
MessageServicefor sending messages to be displayed - injecting
MessageServiceinto theHeroService - displaying a message when
HeroServicefetches heroes successfully
Create the MessageService
Add a new interface to the Services folder, and name it IMessageService.cs.
Replace the content with the following:
using System.Collections.Generic;

namespace TourOfHeroes.Services
{
    public interface IMessageService
    {
        void Add(string message);
        void Clear();
        List<string> Messages { get; set; }
    }
}
Add a new C# class file to the Services folder and name it MessageService.cs.
Replace the content with the following:
using System.Collections.Generic;

namespace TourOfHeroes.Services
{
    public class MessageService : IMessageService
    {
        public List<string> Messages { get; set; } = new List<string>();
        public void Add(string message)
        {
            Messages.Add(message);
        }

        public void Clear()
        {
            Messages.Clear();
        }
    }
}
The service exposes its cache of messages and two methods: one to
Add()a message to the cache and another toClear()the cache.In
HeroService, inject theMessageServiceand assign it to a private field:public class HeroService : IHeroService { private readonly IMessageService messageService; public HeroService(IMessageService messageService) => this.messageService = messageService; List<Hero> heroes = new List<Hero>{ ...This is a typical "service-in-service" scenario: you inject the
MessageServiceinto theHeroServicewhich is injected into the Heroes component. TheMessageServiceis injected via the newly addedHeroServiceconstructor. It is assigned to the also newly added private field via an expression body definition.Register the
MessageServiceas a singleton in Program.cs:public class Program { public static async Task Main(string[] args) { var builder = WebAssemblyHostBuilder.CreateDefault(args); builder.RootComponents.Add<App>("app"); builder.Services.AddTransient(sp => new HttpClient { BaseAddress = new Uri(builder.HostEnvironment.BaseAddress) }); builder.Services.AddSingleton<IHeroService, HttpHeroService>(); builder.Services.AddSingleton<IMessageService, MessageService>(); await builder.Build().RunAsync(); } }Modify the
GetHeroesmethod in theHeroServicemethod to send a message when the heroes are fetched:public async Task<List<Hero>> GetHeroes() { messageService.Add("HeroService: fetched heroes"); return await Task.Run(() => { return heroes; }); }
Display the message from HeroService
The Messages component should display all messages, including the message sent by the HeroService when it fetches heroes.
- Add a new Razor component to the Pages folder and name it Messages.razor.
- Open Messages component and inject the
MessageService:@inject IMessageService messageService - Replace the rest of the code of the Messages component with the following:
This code uses the same@if (messageService.Messages.Any()) { <div class="messages"> <h3>Messages</h3> <button class="clear" @onclick="@(e => messageService.Clear())"> clear </button> @foreach (var message in messageService.Messages) { <div> @message</div> } </div> }ifandforeachstatements that you used in the Heroes component to conditionally display content and iterate over collections. - Add the following styles to site.css:
.messages{ clear: both; } input[text], button { color: crimson; font-family: Cambria, Georgia; } button { background-color: #eee; border: none; padding: 5px 10px; border-radius: 4px; cursor: pointer; cursor: hand; font-family: Arial; } button.clear { font-family: Arial; background-color: #eee; border: none; padding: 5px 10px; border-radius: 4px; cursor: pointer; cursor: hand; } button:hover { background-color: #cfd8dc; } button:disabled { background-color: #eee; color: #aaa; cursor: auto; } button.clear { color: #333; margin-bottom: 12px; } - Amend the Heroes component to include the Messages component:
@page "/heroes"
@inject IHeroService  heroService

<h2>My Heroes</h2>
<ul class="heroes">
    @foreach (var hero in heroes)
    {
        <li @onclick="@(e => onSelect(hero))" class="@(hero == selectedHero ? "selected" : "")">
            <span class="badge">@hero.Id</span> @hero.Name
        </li>
    }
</ul>

<HeroDetail hero="@selectedHero"></HeroDetail>
<Messages />
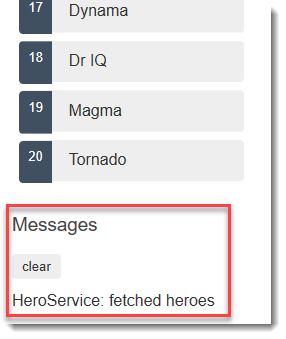
Run the application and navigate to /heroes. The page displays the list of heroes. Scroll to the bottom to see the message from the HeroService in the message area. Click the "clear" button and the message area disappears:
Summary
- You defined the behaviour of the
HeroServicein an interface - You refactored data access to the
HeroServiceclass, ensuring that it implemented the interface. - You registered the
HeroServiceas the provider of its service so that it can be injected anywhere in the app. - You used
@injectto inject it into a component. - The component's
OnInitializedAsynclifecycle hook calls theHeroServicemethod. - You created a
MessageServicefor loosely-coupled communication between classes. - The
HeroServiceinjected into a component is created with another injected service,MessageService.
Previous: Master/Detail Components
Next: Routing
